The Tracked Robot Project 2010
Page 2
To begin construction you will need to have the three main components of the robot which form the basis chassis. You will need to have the laser-cut wooden chassis, or you can cut one yourself using the plans and common woodworking tools... or you can come up with your own unique design based loosely on this chassis. The chassis presented here is open source... you may develop it into anything you like... if you publish a project based on it I would like to get credit for the basic design.Wooden Chassis Parts
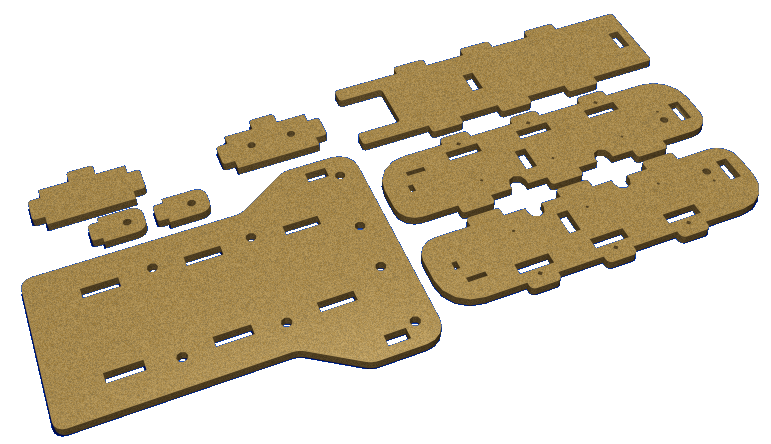
These are what the parts should look like for the default kit with no modifications.
Tamiya Track and Wheel Set - Part Number
TAM70100
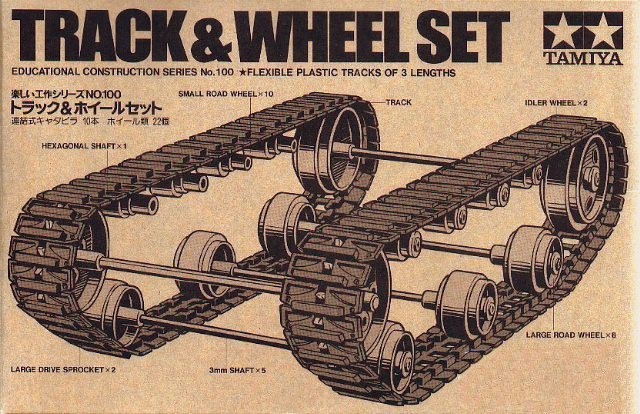
I purchased this unit from the local Hobbytown store.
Tamiya Twin-Motor Gearbox - Part Number
TAM70097 - Front View
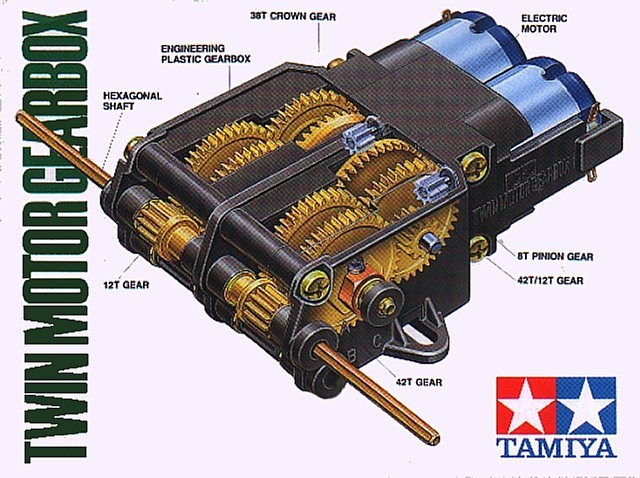
I purchased this unit from the local Hobbytown store.
Tamiya Twin-Motor Gearbox - Part Number
TAM70097 - Back View
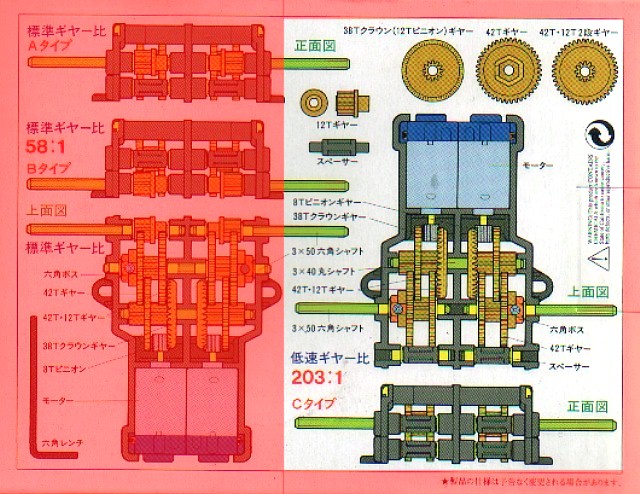
The configuration on the right is the one you want to assemble.
The configuration on the right is the one you want to assemble.
Additionally... and also very important... the robot chassis was designed to have the shaft of the motor use the center-rear power port. Building the motor in the 58:1 configuration would cause you to use the upper-front or lower-front port... and the motor shaft would not align with the hole in the chassis. (If you did modify the chassis... the tracks would not fit properly and would also need adjusting by relocating the rear hole.)
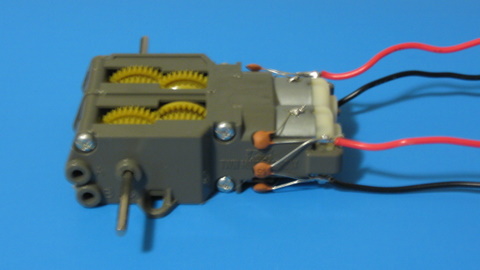
The assembled motor with capacitors and wires added.
I added small capacitors to the motor to remove some of the power spikes from the supply and to make them run slightly more quiet. The motors come with some silicone grease... but if you wish to add a bit more it probably would not be a bad idea. Avoid oil as petroulium products can cause plastics to dry out and crack over time... be sure to only use silicone grease as lubricant.