The Tracked Robot Project 2010
Page 1
Since you are reading this I will presume that you are at least somewhat interested in this project! That's great... I want people to have fun, be interested, to learn, to build, and to share what they have learned. Let's talk about the basics, then work up to more details of the build and what modifications you may want to consider when making your version of the tracked robot.The material selected is a common hardwood that can be found at places like Lowes, Home Depot, and similar stores. The largest width found was listed as six by twelve inches or six by twenty four inches... which is just wrong because it's only slightly wider than five and a half inches wide. The wood that I purchased was 5.5 by 24 inches, or 140 by 610 mm for you metric types. I actually set my CAD program to Metric when I designed the chassis since the Tamiya parts are metric... the axels are 3mm for example. If you want to draw a custom chassis... just be sure to draw it 1:1 and let me know if it's metric or not so that I cut it to the correct size.
| Common Wood Types | |||
 Birch / Alder | 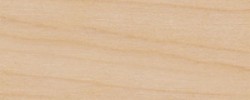 Maple |  Poplar | 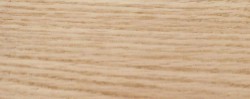 Red Oak |
Plywood could be used, but some grades have a glue that absorbs the energy and converts it to heat, resulting in the wood burning more than cutting. If you want to use an aricraft (hobby) plywood... then we will need to test a piece before I commit to cutting it for you. The wood I tested cuts nicely and consistently throughout... so we get a nice, uniform model. I have used hobby plywood as found locally at Hobbytown and other hobby type stores. The hobby plywood is usually avalable in 12x12 inch panels. The thickness would need to be measured... and the holes for the tabs may need to be adjusted accordingly.

Epilog LASER
As promised, if you don't have a CAD program there are some nice programs out there which have FREE versions you can use. Two of my favorite packages are A9 Tech and CAD Standard. The A9 Tech is very similar to AutoCAD and can directly open and save in the AutoCAD format. It is a more complex program, so it has a steeper learning curve than CAD Standard. The CAD Standard system is more simplistic... it won't do as much... but don't let that lead you to think that it isn't powerful or that you can't create some nice drawings with it. If you opt to purchase the full version for more power, it is still less than $50 which is a very good deal. I have a registered (Pro) version even though I also have AutoCAD because it is simple to use and at times faster because of it's simplicity.
If you need a CAD program pick your selection and download what you need, or just read more at the web page.
 Click the button above to visit the A9 Tech web page. |  Click the button above to visit the CAD Standard web page. |
Buttons supplied by http://www.grsites.com
If you are using CAD Standard, then you can download the CAD format file, and when you are ready to have the part cut email me the native CAD file produced. I'll be able to convert it to be imported into Corel Draw for cutting. If you use A9 Tech or another AutoCAD compatable software package, you can use the DXF or DWG format as needed and submit your version in either format as long as it is compatable with AutoCAD 14 or prior versions.
Download the version of the chassis file that you need here.
 Compatable with CAD Standard |  AutoCAD Native Format |  Drawing Exchange Format |
Parts Layout as seen from CAD Standard - Click the image to download a PDF view.